In addition to the sales of macarons & cupcakes our stall will also feature various festive & celebrative displays.
Take a Behind-The-Scenes look from concept to reality...& a macaron baking tutorial along the way...of one of these displays: “O Christmas Tree! O Christmas Tree!”.
 |
| A rough sketch of a Christmas table centre piece. |
 |
| Styrofoam cone to which macaron shells are to be attached & a base to which the tower is secured. |
 |
| After measuring & calculating the number of macaron shells required it's time to weigh & age the egg whites. |
 |
| Weigh the quantities of almond meal & icing sugar. |
 |
| Process the almond meal & icing sugar until a fine powder is achieved (to obtain macaron shells with a smooth finish & surface). |
 |
| Sift the almond meal & icing sugar mix breaking up any clumps. |
 |
| Add red powder food colouring to the dry ingredients. |
 |
| As mentioned in a previous post I prefer the macarons au sucre cuit (Italian Meringue) method when baking macarons, thus enter my trusty friend "The Candy Thermometer". |
 |
| Boil the sugar syrup & wait for the temperature to reach 118 degree celsius. |
 |
| When the temperature of the syrup reaches 110 degree celsius, start whisking half of the egg whites to firm peaks. |
 |
| Pour the other half of the egg whites & scoop the meringue into the dry ingredients, & in a circular motion mix the batter around & under the bowl until... |
 |
| ...the consistency of the batter is "like magma". (Powder food colouring is highly concentrated see how vibrant the final macaron batter is). |
 |
| Pipe the shells & allow the shells to dry for 30 to 45 minutes until a dry film is formed. |
 |
| Cool macaron shells on a baking rack once out of the oven. |
 |
| Repeat the steps for green macaron shells. |
 |
| Pipe green macaron shells & allow to dry. |
 |
| Cool green macaron shells on a baking rack. |
 |
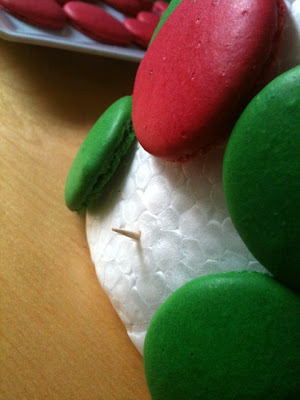
| Gently peel the shells from the baking paper. Now time to attach the red & green shells onto the styrofoam cone. |
 |
| I used tape initially to position the shells. |
 |
| Then used toothpicks to attach the shells onto the cone. |
 |
| Push the toothpick into the cone with an appropriate length left to allow secure attachment of the fragile shells. |
 |
| Ta-Da! A Christmas Tree Macaron Tower for a Christmas table centre piece! |
 |
| An excellent focal point to set the mood of the party... |
 |
| ... , as a conversation starter or simply to inspire. |
 |
| Continue to decorate the Christmas table with other festive ornaments & ideas. |
Together we can create that sweet treat an occasion to remember!

Omg! That's really cute =]
ReplyDeleteLove the bright colours, and especially the addition of bows ;)
Also, didn't know that your sketches are actually pretty decent =P
Totally fabulous!! Love it!!
ReplyDeleteHi Amy,
ReplyDeleteI had alot of fun making the macaron tower despite having sustained numerous toothpick injuries..hahaha..
Sketching takes me back to Art classes in high school. I remember there was a drawing I received high marks for, it was a hybrid of Audrey Hepburn & Sophie Loren how i wish i had kept that drawing!
Hi Winnie,
ReplyDeleteThank-you *blushing*...YOUR cakes are fabulous!!!
Is it that time of year already? Xmas is around the corner..
ReplyDeleteYour macaron tower is so cute! Would you be making an edible version of it though? With the full macarons? If so, that'd be awesome!
Thx Phuoc,
ReplyDeleteAn edible macaron tower is in the pipe line...stay tuned!
hi,
ReplyDeleteHow do you make the styrofoam cone? i want to make one, do you mind telling me ? thanks